
Japan’s cities deservedly get so much of the tourist attention, but the mountains are just as spectacular. In fact, one of our drivers for visiting Japan was the chance to explore the so-called Japanese Alps: a long mountain range dominating much of Northwestern Honshu.
In the end Mica and I decided to make the Denver-like city of Matsumoto our home-base to spend a week exploring the area. Our primary goal was to hike the famed Mt. Yari-Daikeretto-Mt. Hotaka circuit.
The Kamikochi-Yari-Hotaka Circuit
The three day, two-night loop climbs 1,700 meters up from the Kamikochi valley up to the summit of Mt. Yari (Japan’s 5th highest mountain) before coming back via the Daikeretto (it’s most famous ridge) and Mt. Hotaka (the 3rd highest mountain). With that many highlights it is one of the seminal alpine hikes in Japan.
- Day 1 represents a day-long slog to the top of Mt. Yarigatake (槍ヶ岳), at 3,180 meters the third highest mountain in Japan with an incredible mountain hut stay
- Day 2 takes you along knife-edge ridges, including the famed Daikeretto (大キレット) where the trail drops 300 meters between two mountains, and claims several lives each year, before finishing with a climb up Mt. Hotaka (奥穂高岳) Japan’s fifth largest mountain
- Day 3 offers several descents through the Karasawa Valley, a prime Japanese fall foliage area
So this was the dream, a route so good it was half the reason we timed our trip to Japan for October.
Long-planned and long-awaited we were eager to set off. But of course, these are mountains we’re talking about. And mountains don’t care about your plans or your timeline. They demand your respect, not the other way around.
So what happened?
Day 1: Matsumoto-Kamikochi-Mt. Yari
Kamikochi (上高地) is the most famed and popular spot to kick off many Japanese Alps hikes and this one is no exception.
Getting to Kamikochi
From Matsumoto there are two ways to main ways to get there. A once-daily 5:30 AM direct bus, or a 30 minute train ride to Shin-Shimashima Station followed by a 60 minute bus ride. We opted for the early start which is necessary to make this ambitious Day 1 itinerary work (alternatively camp/stay in a hotel in Kamikochi the night before).
With Mica asleep next to me, the bus followed a long series of switchbacks through different Onsen towns before passing Taisho pond and entering the Chubu Sangaku National Park proper. A grey and dreary sky began to lift as we got to Kamikochi promising the forecasted window of good weather.
After registering our itinerary with the mountain rescue office and downing a couple cups of coffee we set off. (Note: there are no trash-cans here. Vendors will take back what they sell you but will NOT take any of your other garbage. Plan your breakfast/snacks from Matsumoto accordingly).
The Kamikochi to Mt. Yarigatake Hike
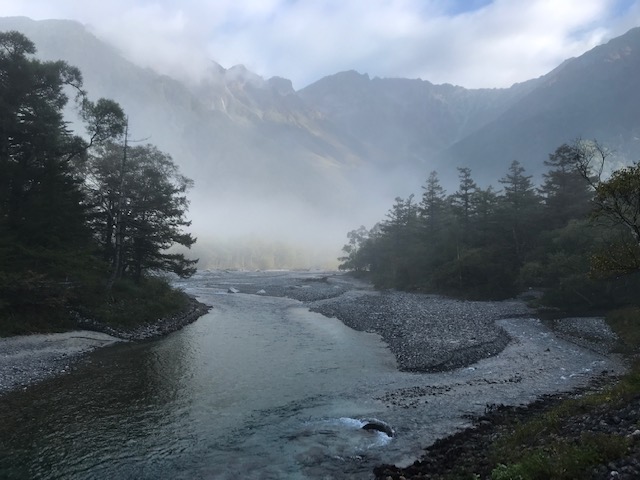
The hike begins by following the Azusagawa River river up a wide and flat valley. The hiking is easy for the first 2-3 hours as you first pass Myojinkan lodge (1 hour in) and another valley hut, both with free water to replenish your bottles.
The hike begins 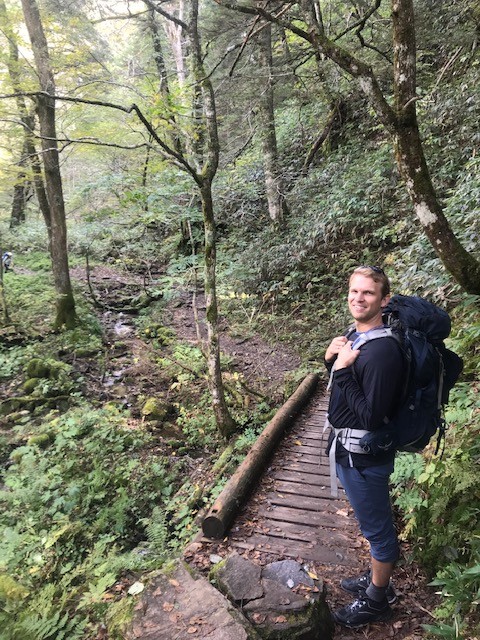
About 2.5-3 hours in you get to the first notable juncture near Tokusawa and Yakoo lodges. This is a good place to stop and eat some snacks as the rest of the day gets a lot harder. After mingling with the hundred strong crowd we began to climb more steeply up the Yarisawa Valley. Almost immediately the trail narrows and the crowds dissipate. The official high country approach has begun.
After a little over an you arrive at the Yarisawa hut, which is another good lunch stop. It offers good food and a welcome respite from the steady climb. Take advantage of the moment to steel yourself before the real fun begins. A 30 minute climb from the hut takes you to a nearby campground: not a bad stopping point if you don’t have another 2-3 hours of vertical climbing left in your legs. The ground here is rocky but sheltered, and the view of the Alpine bowl and fall colors is very nice. This campsite is the last place for filtered water (although in about 1.5 hours or so there is a dependable creek that cuts down across the trail from the mountains to your right that looked clean and filterable).
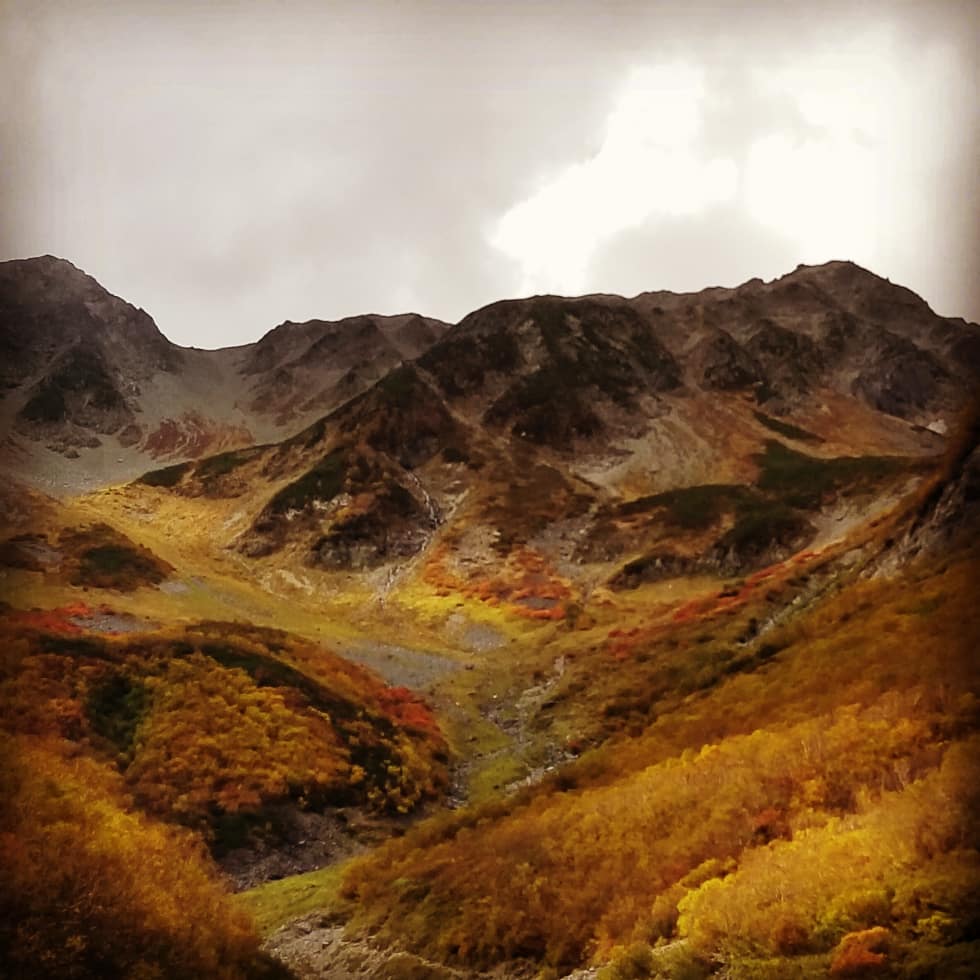
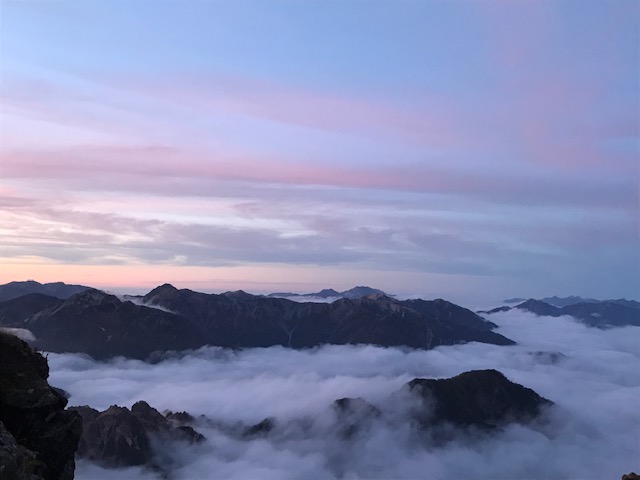
From here the terrain becomes notably alpine and rocky, with the route staying largely above or next to treeline. For us in mid-October we had most definitely walked up into fall foliage which offered beautiful vistas even as we slogged ever higher.
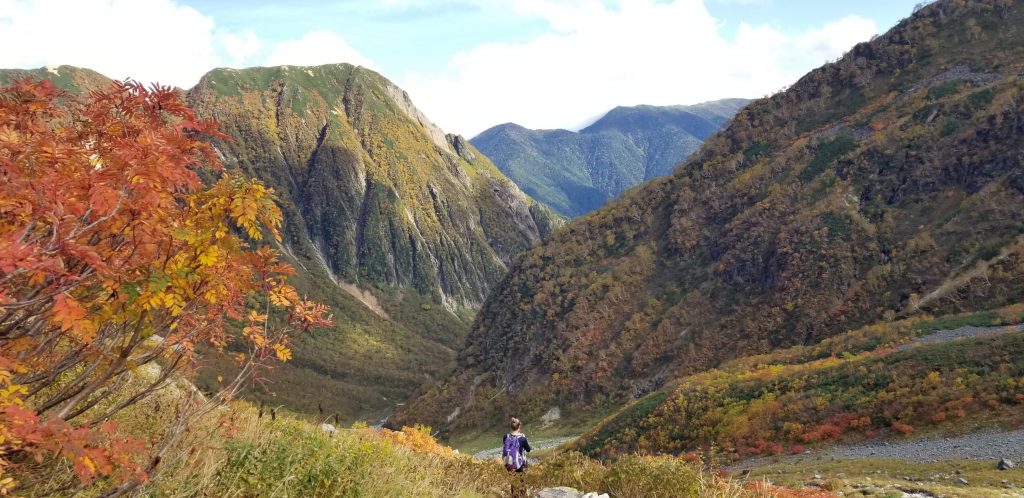
As we left the river to veer east, Mt. Yarigatake finally appeared off to the right, a towering sentinel with a view of the remaining hours of climb unapologetically visible to digest.
A few of ascent options present themselves here (including a couple of nearby huts and one last campsite about 45-60 minutes below the ultimate ridge).
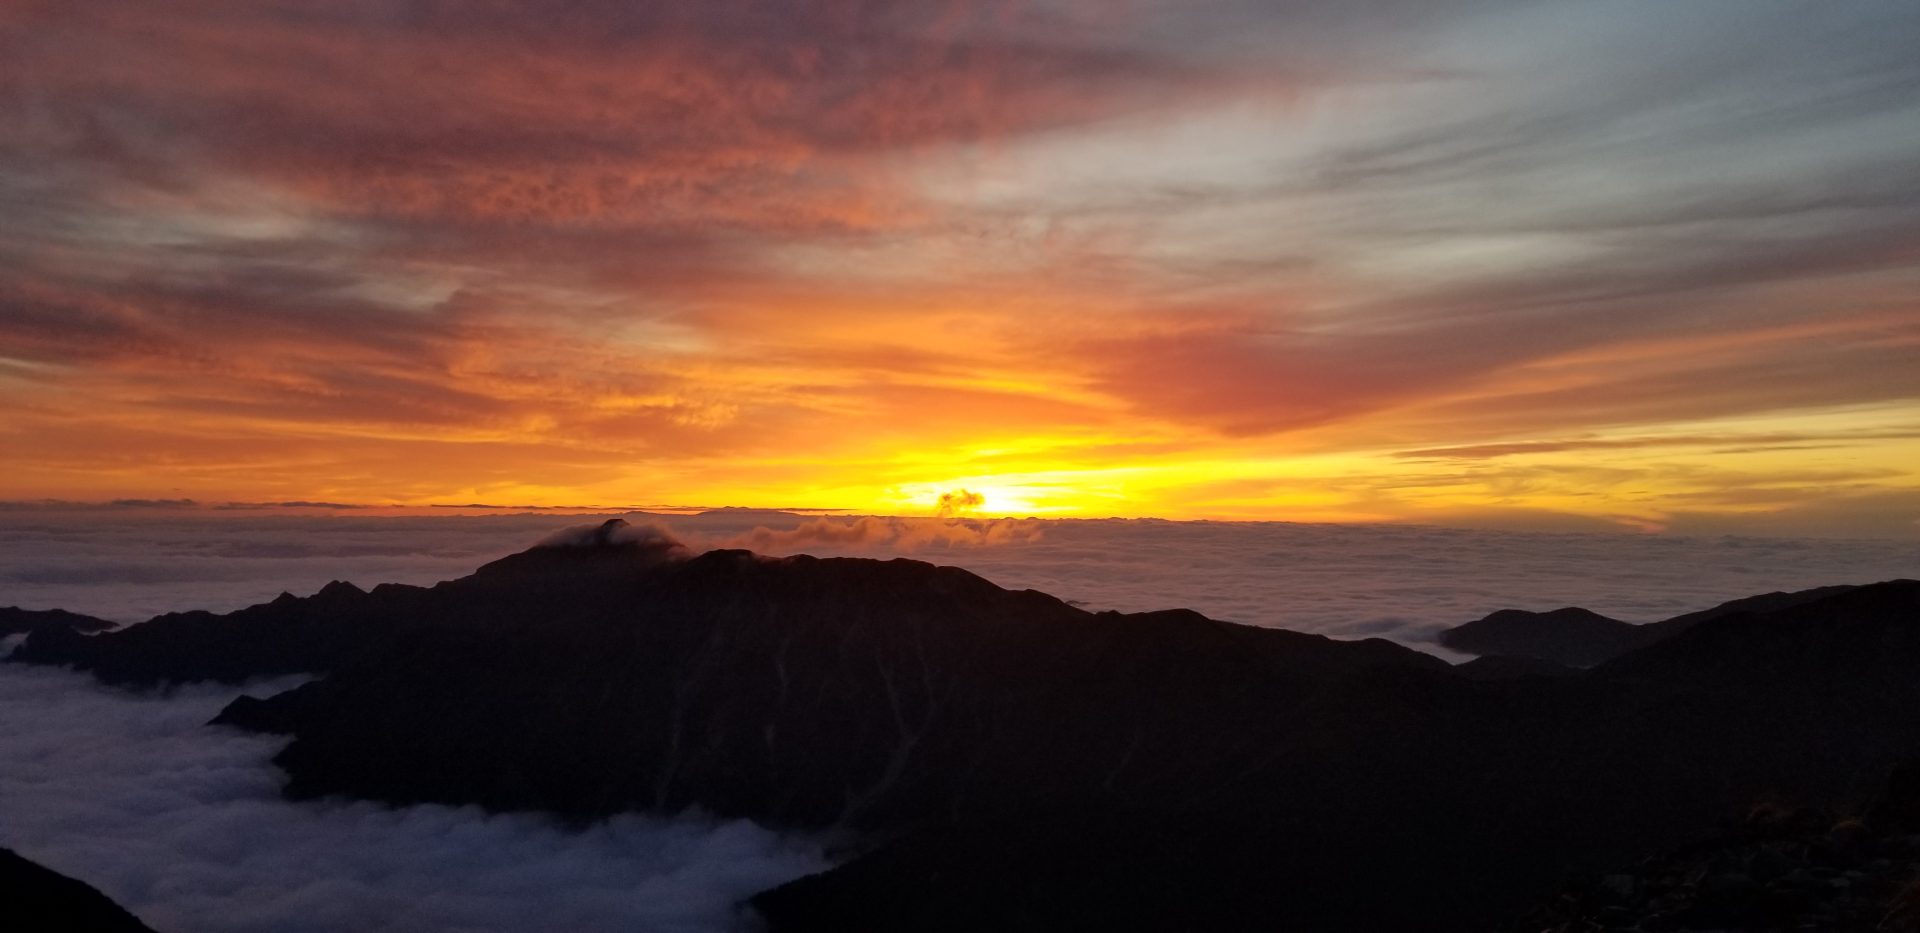
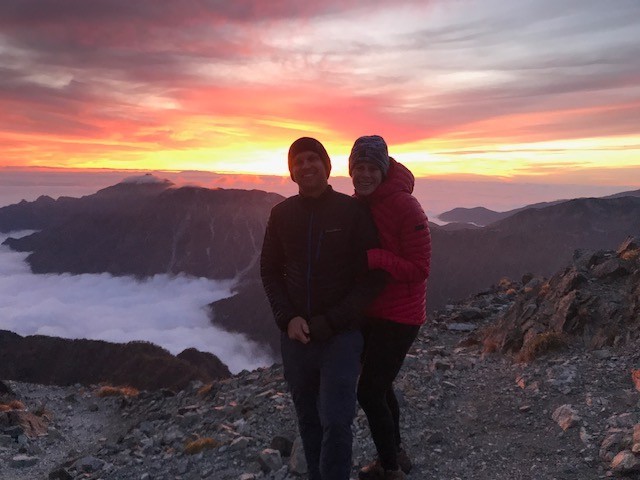
For what its worth, we recommend getting to Yarigatake-sanso hut because (a) reservations are not required and (b) the sunset is completely and utterly incredible:


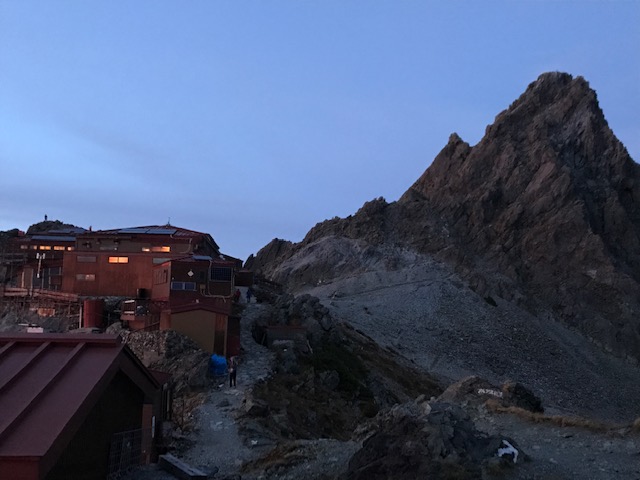
In terms of the hut itself, it is a well run mountain hut that does not require reservations for small parties (9,800 yen with two meals, 6,800 without).
The food was OK, the sleeping area had curtains which was a nice touch, and the bathrooms were clean. It’s still a weird feeling to order a beer or sake at the top of the mountain, but it’s a nice luxury even if its less wild than what we’re used to. There are also very limited tent sites available (1,000 yen a night) which are decently protected from the wind whipping over the ridge but you have to get here early to have a chance at one.
Some practical notes covering Day 1
- While distances throughout the day were not astronomical, the combination of elevation and tough terrain over the last 4-5 hours does take its toll. Be prepared for a very long day if tackling this hike and don’t discount the times posted on the topo map between locations, especially for the 2nd half of the hike. The 5:30 bus is your only realistic option of making it up to Yari-sanso hut in time for dinner/sunset.
- Until the campground 30 minutes past Yarisawa hut there are fairly frequent water sources. You do not need to haul a ton of water.
- You can scramble the summit to Mt. Yarigatake from the hut in about 20-30 minutes (up). The hut has helmets to rent which are designed for protection from any loose rocks other climbers dislodge. Outside of weather, which prevented our morning ascent attempt, the main obstacle here is dealing with the crowds of other summiteers which can really slow you down. In other words, don’t leave right after breakfast
- While we had diligently translated the huts and major trail points on our topo map from Kanji to English most trail signs were clearly marked in both. There’s a photo in the logistics section at the end to help you translate your own map as this was very time consuming
Day 2: The Daikeretto…or not
We woke up at about 4:15am on Day 2. This isn’t as bad as it sounds because we were asleep by about 7pm. Also, the Ravens were in the fourth quarter of a tie game with the Steelers and we found a radio stream in time to listen to a thrilling and necessary win!
Breakfast was at 5:30, which is standard at Japanese mountain huts. After we milled around looking at the whipping cold and wet wind and occasional drizzle wondering if the expected sunny forecast would ever materialize.
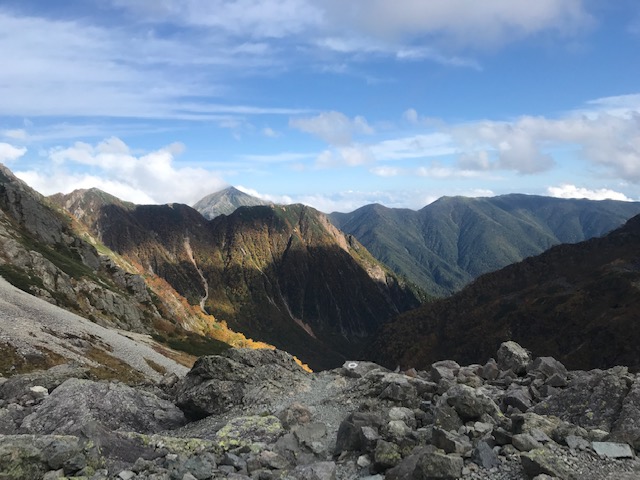
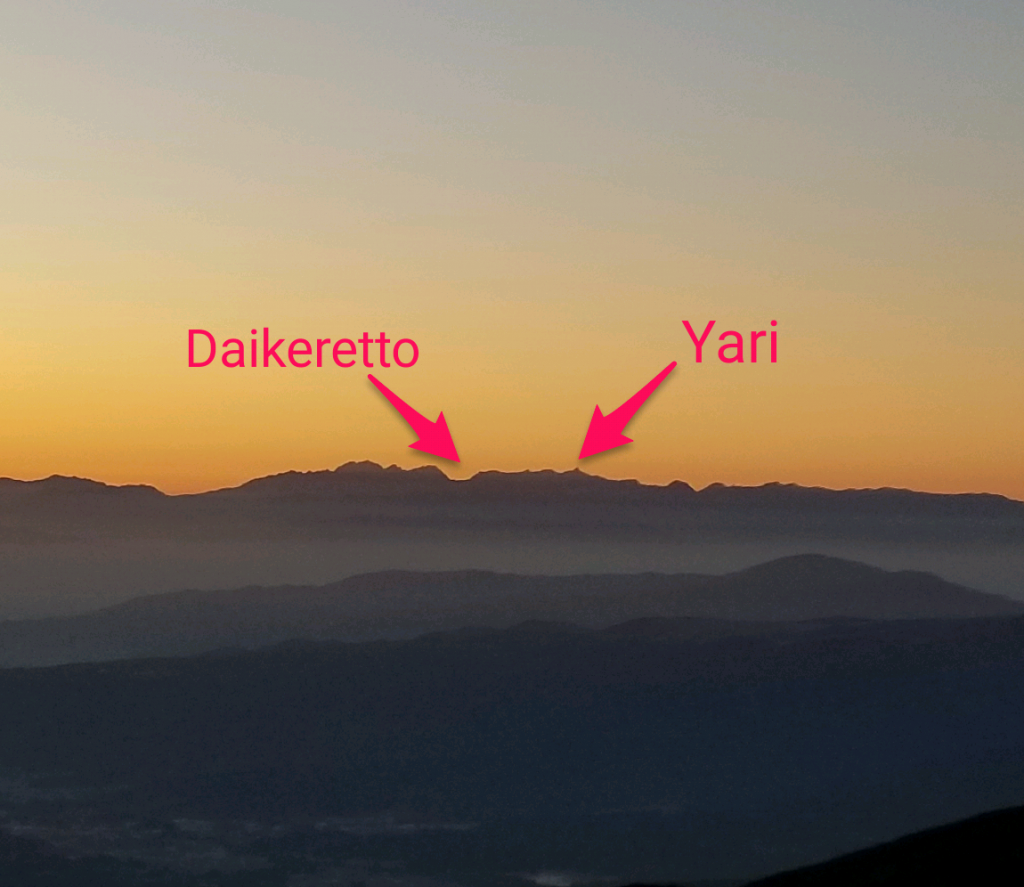
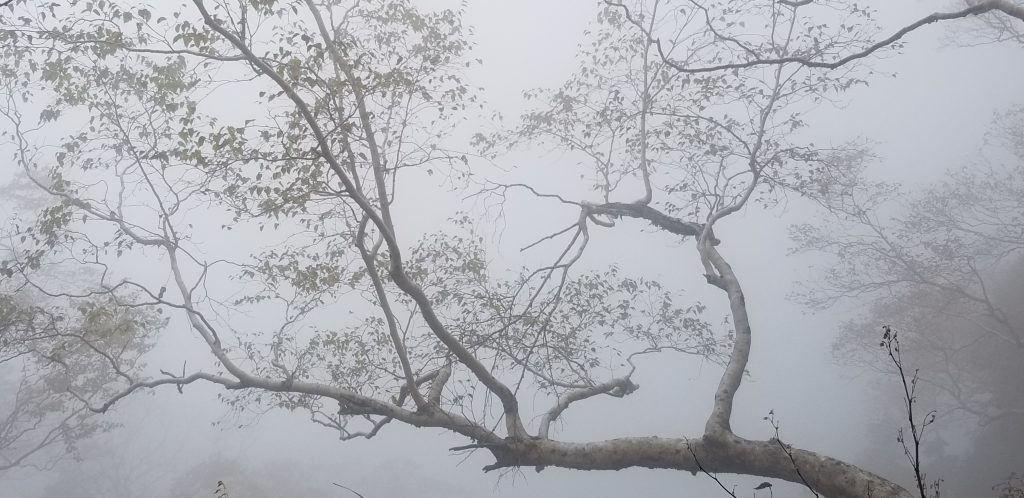
It didn’t, and it wouldn’t. Ever hopeful we began our day on the ridge heading over three consecutive 3,000+ meter peaks towards the Daikeretto anyway. As previously mentioned, the Daikeretto is a gap in the mountains that is precariously traversed by one centimeters wide trail. We didn’t end up on the ridge, but from our next hike in Yatsugatake 50 odd miles away, the Daikeretto looks like this:
After a cold, wet and generally difficult two hours we found ourselves at Minamidake Goya hut thoroughly soaked because (a) we didn’t have rain pants and (b) Victor found out the hard way his shell wasn’t very good. After eating some ramen and trying to warm up and dry off next to a kettle we realized we were just getting colder and colder. Time to move. But where to?
Minamidake Goya hut marks the last turnoff down the mountains before the trail becomes much more technical. With continued spitting rain and whipping clouds there was no chance we were attempting the ridge.
So down we would go, with the realization that this route, our pre-established bailout route, doesn’t end up back at Kamikochi but instead at Shinotaka Onsen, a separate entrance to the park. If you think there’s a chance weather interrupts your loop, don’t buy the round-trip bus ticket from Matsumoto to preserve flexibility.
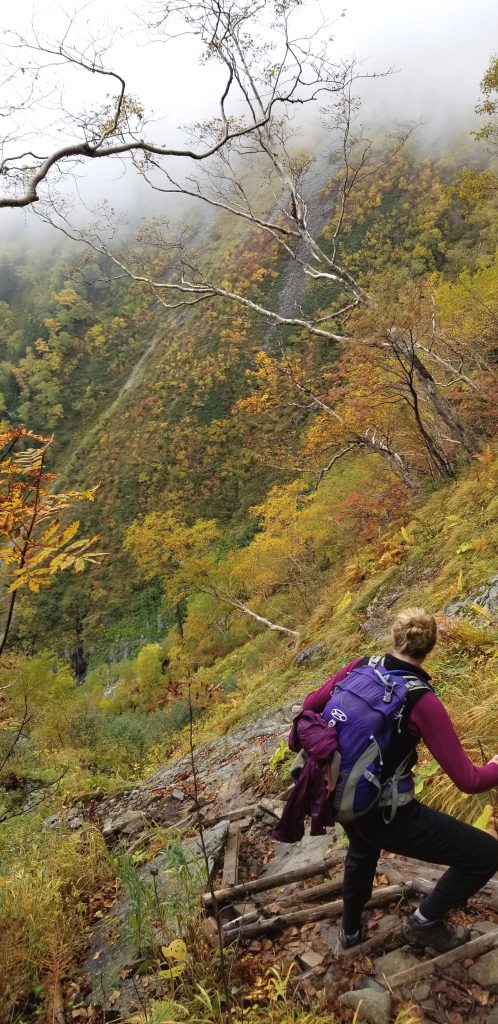
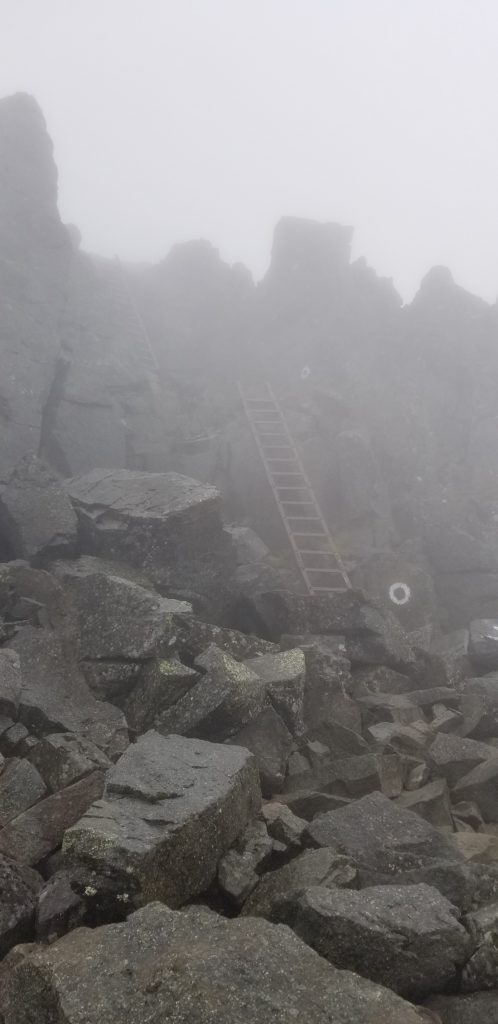
The descent from this hut into our 2nd mountain valley was hard. First, we descended chains and ladders onto narrow ridges, with horizontal ladders snaking over the scant shrub surviving between each peak. Visibility was good enough here that it wasn’t dangerous, and once we had descended a bit the weather’s bite also subsided enough that we were nicely warmed up. But then the trail hit us with a 2.5 hour bushwacking descent down slick rock, partially decomposed wood ladders, and generally overgrown trail. This was clearly a murderously tough trail even in good conditions and rarely used as a result. Our progress was glacial and well-earned, with moments of wonder for the solitude and hints of fall peaking at us through the fog.
Finally we hit the valley bottom around 3pm. Legs shaking, knowing tomorrow was bringing heavy and consistent rain, Mica jumped into action asking the hut staff to book us a hotel down the mountain.
An Accidental Ryokan and Onsen Experience
Everything near the trailhead was booked, but they eventually found us a hotel that would pick us up if we could get there before sunrise so we wouldn’t miss the prescribed dinner time. We didn’t know where this place was, how much it cost, or what it would be like. But after 10 minutes of rest off we went, racing the sun with visions of a dry bed ahead of us.
Half jogging, half power hiking we made good time down a beautiful trail hugging a thundering mountain stream and passing an epic waterfall spilling down in the distance. After about 90 minutes the trail became a gravel road and we bombed down to civilization just before sunset. We called the hotel and miracously before we could even put on a layer the car was there, and a 15 minute drive later we were told by a 70+ year old Japanese man, the only person there who could speak any English, that dinner was in 20 minutes, the men’s and women’s public baths were down this hallway, and we could check in later. After the day we had that was fair enough: I imagine we did smell that bad.
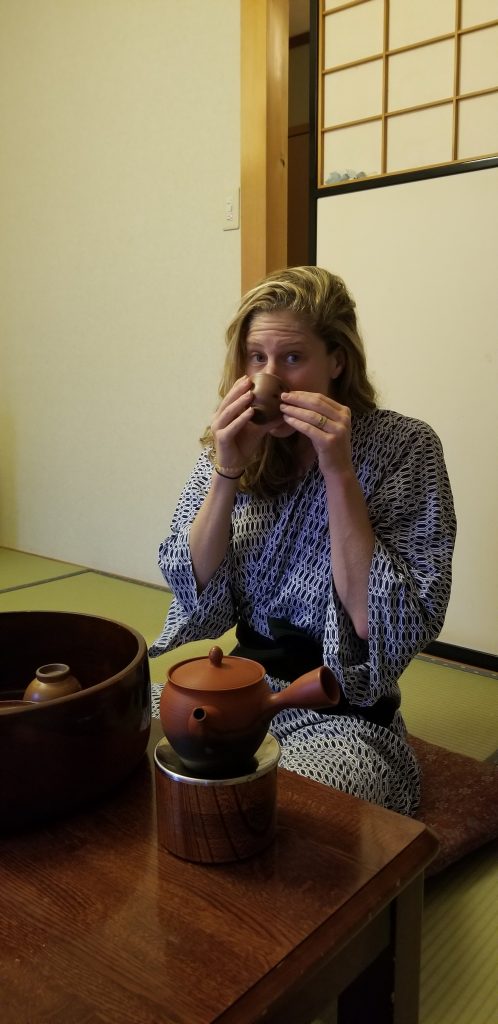
In the end, somehow we had stumbled, most gloriously, into a truly authentic Ryokan and onsen experience at Mahoroba (the name we would only discover later). If you’re in the area, we highly recommend a night here for a relatively affordable and truly authentic ryokan.
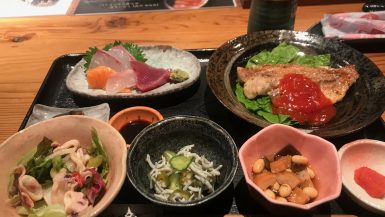
This was mountains, like only the Japanese, can do. Wild weather, hospitable huts, steaming lava springs, and a seven course tasting dinner casually spread out before us filled with a half dozen dishes we didn’t recognize and couldn’t ask about.
The next day, watching the rain pour down for hours, and sitting in a private outdoor Onsen I would think to myself that while this wasn’t the Daikeretto, this was some consolation prize indeed.
Logistics for Kamikochi and Hiking in the Japanese Alps
You will need Map #38. The bookstore at the train station mall, which you can find if you enter the glass doors to the right of Starbucks on your way out and going towards the back) had the entire topo map series. There are also excellent outdoors stores in the main department store as well as the New Media Center if you need gear, the latter also has an outpost of the Matsumoto Brewing Company that we highly recommend.
If you’re going to hike up to Mt. Yari, you’re going to want a day or two up on the ridges to soak in the views we didn’t get. You’ve earned it. The best weather reports I found were from weawow.com.
This person’s account of the full loop is another great starting point for planning or getting inspired:
Matsumoto makes an excellent base camp for the region. We stayed two nights at Hotel Buena Vista (recommended, especially the executive suites which aren’t much more expensive with advance planning) and one night at the New Station Hotel (totally fine/nice). The Dormy Inn Matsumoto is also supposed to be amazing.
This looks awesome 🙂
Especially the onsen experience at the Mahoroba! Glad you are enjoying it all.
Thanks Connor!
What an EXTRAORDINARY tale! And – what do you mean a “one centimeters-wide trail????”